Don't negotiate with e-terrorists. Be a hero and rescue your hostage PC. With nasty malware like Locky making
the rounds—encrypting its victims’ files, and then refusing to unlock
them unless you pay up—ransomware is a serious headache. But not all
ransomware is so difficult.
You can remove many
ransomware viruses without losing your files, but with some variants
that isn’t the case. In the past I’ve discussed general steps for removing malware and viruses,
but you need to apply some specific tips and tricks for ransomware. The
process varies and depends on the type of invader. Some procedures
involve a simple virus scan, while others require offline scans and
advanced recovery of your files. I categorize ransomware into three
varieties: scareware, lock-screen viruses, and the really nasty stuff.
Scareware
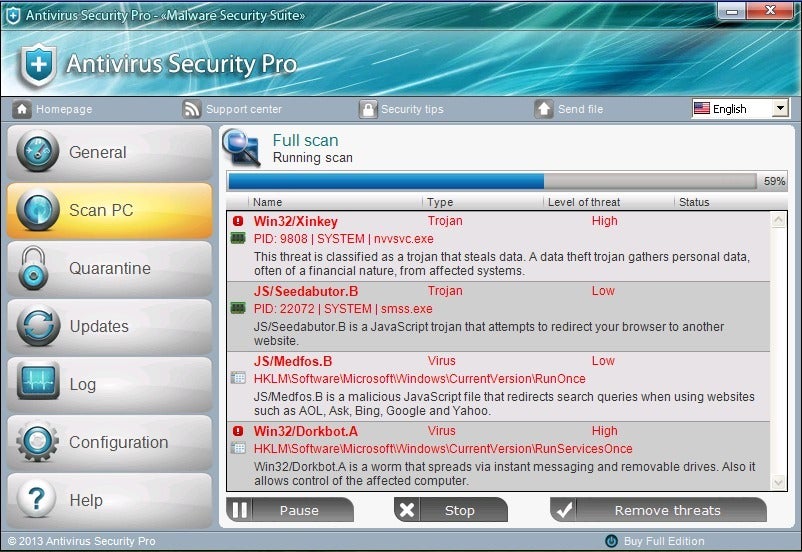
An example of a fake antivirus app.
The
simplest type of ransomware, aka scareware, consists of bogus antivirus
or clean-up tools that claim they’ve detected umpteen issues, and
demand that you pay in order to fix them. Some specimens of this variety
of ransomware may allow you to use your PC but bombard you with alerts
and pop-ups, while others might prevent you from running any programs at
all. Typically these invaders are the easiest type of ransomware to
remove.
–– ADVERTISEMENT ––
Lock-screen viruses
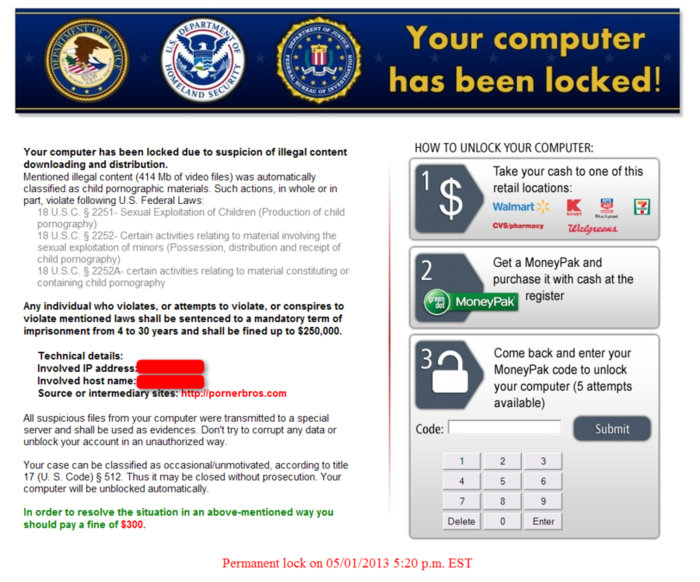
The Kovter ransomware locks down your computer, displaying a fake notice claiming to be from several government authorities.
Next
is the ransomware variety I call lock-screen viruses, which don’t allow
you to use your PC in any way. They display a full-size window after
Windows starts up—usually with an FBI or Department of Justice
logo—saying that you violated the law and that you must pay a fine.
The really nasty stuff
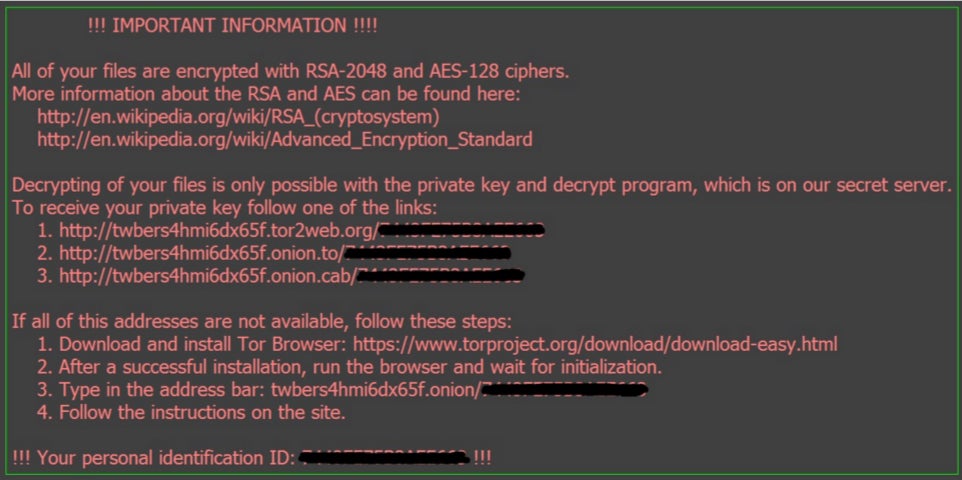
McAfee
A ransomware program called Locky has quickly become one of the most common types of malware seen in spam.
Encrypting
malware—such as Locky—is the worst variant, because it encrypts and
locks your personal files until you pay up. But even if you haven’t
backed up your files, you may have a chance to recover your data.
Removing ransomware
Before you can free your hostage PC, you have to eliminate the hostage taker.
If
you have the simplest kind of ransomware, such as a fake antivirus
program or a bogus clean-up tool, you can usually remove it by following
the steps in my previous malware removal guide. This procedure includes entering Windows’ Safe Mode and running an on-demand virus scanner such as Malwarebytes.
If
the ransomware prevents you from entering Windows or running programs,
as lock-screen viruses typically do, you can try to use System Restore
to roll Windows back in time. Doing so doesn’t affect your personal
files, but it does return system files and programs to the state they
were in at a certain time. The System Restore feature must be enabled
beforehand; Windows enables it by default.
Eric Geier/IDG
You can usually bring up the Advanced Boot Options of Windows 7 by pressing F8 during booting.
To start the restoration process using System Restore, follow these steps depending on your OS version:
Windows 7
Shut down your PC and locate the F8 key on your PC’s keyboard.
Turn the PC on, and as soon as you see anything on the screen, press the F8 key repeatedly. This action should bring up the Advanced Boot Options menu.
Select Repair Your Computer and press Enter.
You’ll likely have to log on as a user. Select your Windows account
name and enter your password. (If you don’t have a password set, leave
that blank.)
Once logged on, click SystemRestore.
Windows 8, 8.1, or 10
Eric Geier/IDG
You can get to the recovery options of Windows 8, 8.1, and 10 by holding shift when rebooting from the Windows login screen.
If your PC boots to the Windows login screen, hold the Shift key, click the power icon, and select Restart.
It should reboot to the recovery screens.
Select Troubleshoot > Advanced Options > System Restore.
If you can’t get into the recovery screens, you can use
the Windows installation media (disc or USB drive) for your particular
version/edition to access the recovery tools. You’d boot up to that
install media, but click Repair your computer on the main menu
before proceeding with the installation. Alternatively, you can create a
Windows System Repair Disc on another PC running the same Windows
version, and then boot to that disc on the infected PC to reach the same
recovery tools. We’ve previously discussed this process for Windows 7, Windows 8, and Windows 10.
If
System Restore doesn’t help and you still can’t get into Windows to
remove the ransomware, try running a virus scanner from a bootable disc
or USB drive; some people refer to this approach as an offline virus
scan. My favorite bootable scanner is from Bitdefender, but more are available: Avast, AVG, Avira, Kaspersky, Norton, and Sophos all offer antivirus boot-disk software.
Eric Geier/IDG
Bitdefender’s antivirus boot disk in action
If
you still have no luck after trying Safe Mode and an on-demand scanner,
performing a System Restore, and running an offline virus scanner, your
last resort is likely to perform a full restore or clean re-install of Windows. Most ransomware isn’t that tenacious, however. Eric Geier/IDG
Showing hidden files in Windows 7 takes a couple of clicks.
Recovering hidden and encrypted files
With
that out of the way, it’s time to repair the damage. If you’re lucky,
your PC was infected by malware that didn’t encrypt your data. If it
appears you’re missing stuff though, the malware may have merely hid
your icons, shortcuts, and files. It usually does this by making the
files “hidden.” Here’s how to check, depending on your OS version:
Windows 7
Open Computer.
Press the Alt key and select Tools.
Click Folder Options and select the View tab.
Select Show hidden files, folders, and drives, and then click OK.
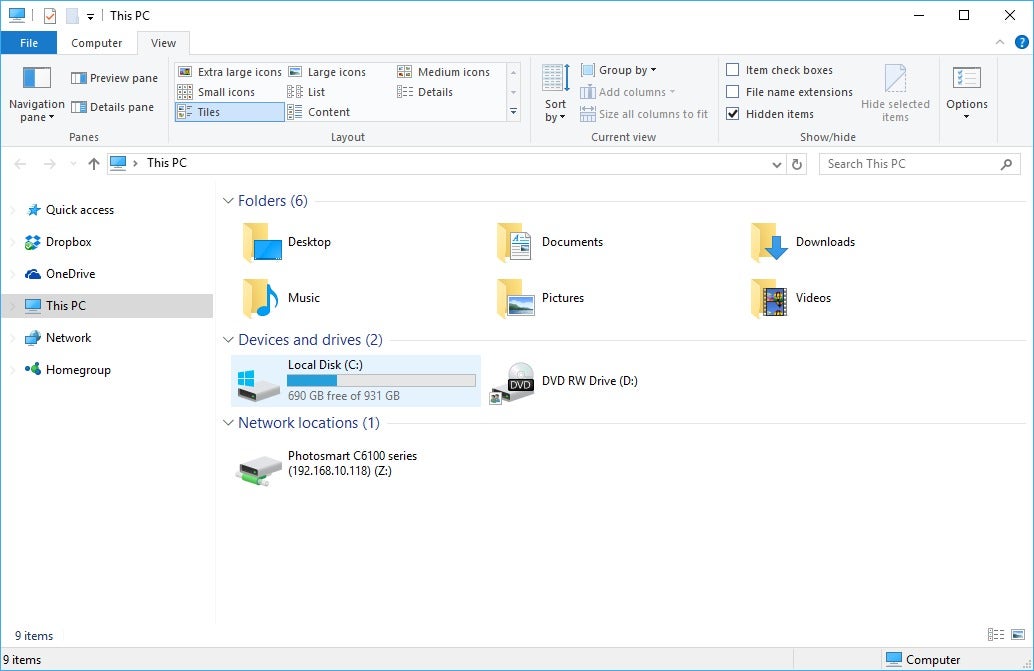
Windows 8, 8.1, and 10
Open a File Explorer window.
Select the View tab on the top pane.
Check Hidden items.
if your data reappears after you elect to show hidden files, that’s great—it means there’s an easy fix for your woes. Open Computer or File Explorer, navigate to C:\Users\, and open the folder of your Windows account name. Then right-click each folder that’s hidden, open Properties, uncheck the Hidden attribute, and click OK. Boom! Done.
If
you still can’t find your data, and your files really have been
malware-encrypted, you’re in trouble. Usually it isn’t possible to just
decrypt or unlock your hostage files, because the decryption key is
typically stored on the cybercriminal’s server. Some victimized users
have reported that some pieces of malware will keep their promise,
decrypting and returning your files once you pay, but I don’t recommend
paying.
This is why we constantly tell you to back up your PC on a regular basis.
If you previously set and created backups, scan them for viruses on another PC (one that is not infected)
if at all possible. If all of your important files are backed up, you
can proceed in removing the malware and then simply restoring your
backed-up files.
If you don’t have a backup system in place, you might be able to recover some files
from Shadow Volume Copies—if the malware hasn’t deleted them. Shadow
Volume Copies is part of Windows’ System Restore feature. Either
right-click on thefiles or folders you want to restore and open Properties to view the Previous Versions list, or use a program called Shadow Explorer to browse the snapshots.
But don’t rely on that. Start backing up your PC today, and do it regularly.
Preventing ransomware and malware infections
Avoiding ransomware is much the same as avoiding other types of other malware.
Always run a good antivirus utility and keep Windows and browser-related components (Java, Adobe, and the like) updated. Keep your browser clean of junk toolbars and add-ons to prevent adware invasions that could lead to malware infections. Always, always be wary of unexpected email attachments and spam.
And
just to beat this dead horse one more time: Always have a good backup
system in place, just in case your PC does become infected and you can’t
recover your files. Yes, it’s that important. Editor's note: This article was oroginally published January 13, 2014, and updated April 3, 2017.


 With nasty malware like Locky making
the rounds—encrypting its victims’ files, and then refusing to unlock
them unless you pay up—ransomware is a serious headache. But not all
ransomware is so difficult.
You can remove many
ransomware viruses without losing your files, but with some variants
that isn’t the case. In the past I’ve discussed general steps for removing malware and viruses,
but you need to apply some specific tips and tricks for ransomware. The
process varies and depends on the type of invader. Some procedures
involve a simple virus scan, while others require offline scans and
advanced recovery of your files. I categorize ransomware into three
varieties: scareware, lock-screen viruses, and the really nasty stuff.
With nasty malware like Locky making
the rounds—encrypting its victims’ files, and then refusing to unlock
them unless you pay up—ransomware is a serious headache. But not all
ransomware is so difficult.
You can remove many
ransomware viruses without losing your files, but with some variants
that isn’t the case. In the past I’ve discussed general steps for removing malware and viruses,
but you need to apply some specific tips and tricks for ransomware. The
process varies and depends on the type of invader. Some procedures
involve a simple virus scan, while others require offline scans and
advanced recovery of your files. I categorize ransomware into three
varieties: scareware, lock-screen viruses, and the really nasty stuff.

 McAfee
  Eric Geier/IDG
  Eric Geier/IDG
  Eric Geier/IDG
  Eric Geier/IDG


 McAfee
 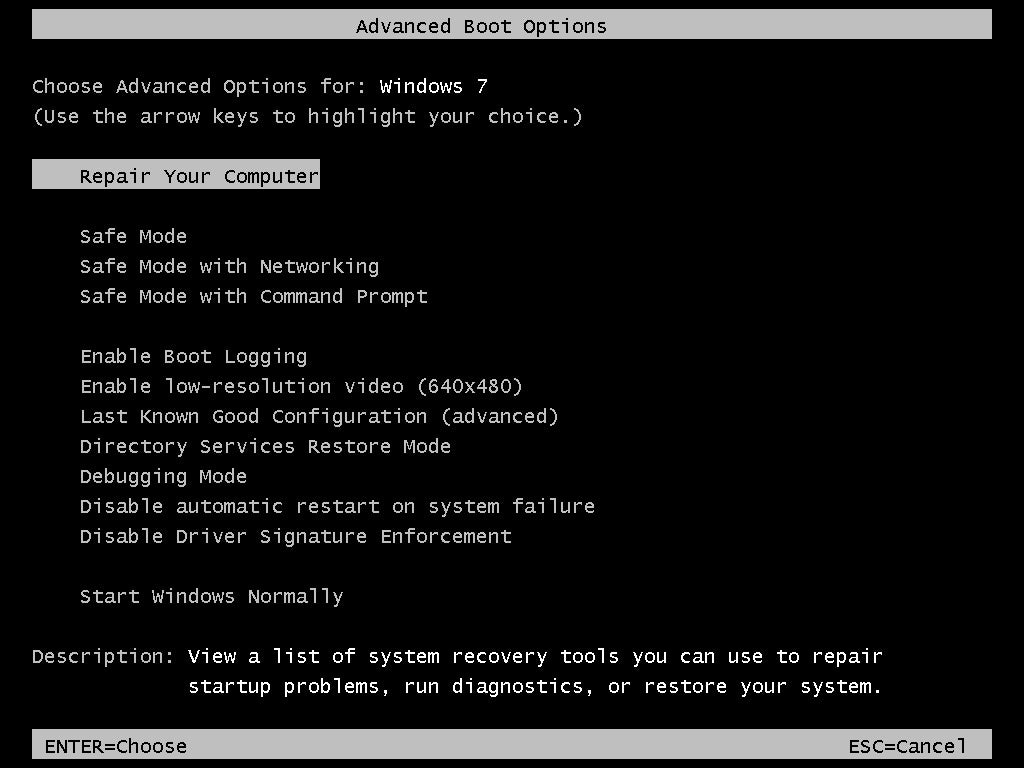 Eric Geier/IDG
 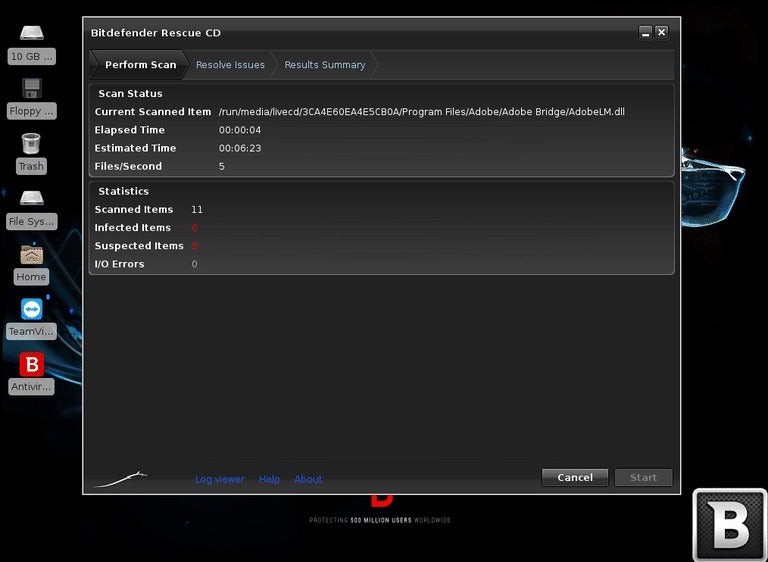 Eric Geier/IDG